Sunday, May 31, 2009

Pizza!

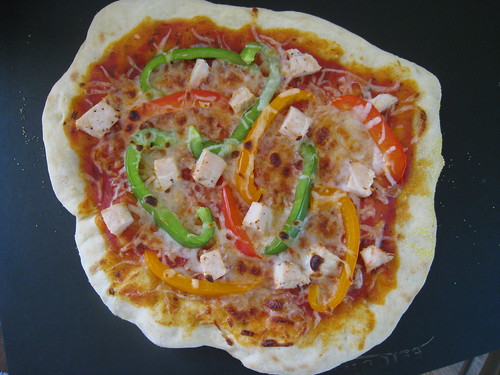
Homemade pizza :)

I've been wanting to make my own pizza at home and kept putting it off because I didn't have a pizza stone...and...I couldn't take it anymore so I went ahead and decided to just go for it ^^;

mmm

I don't have a stand mixer...or any mixer at all at the moment, so I mixed it all by hand...in a bowl that was probably 5x too small. All I can say is that my shoulder was sore for a bit after I made the dough, and there was flour all over my kitchen. I really can't wait till I move home and have all my baking equipment, not to mention a regular kitchen, at my disposal :)

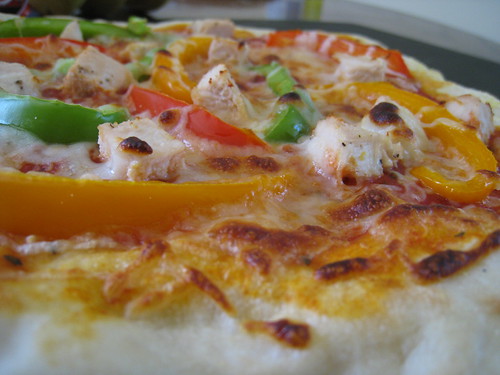
slices!

I topped my pizza with a tomato sauce which was just tomato paste seasoned with salt, pepper, and whatever seasonings I had and then topped it with chicken and bell peppers. mmmmm...but I think I could use more work withe making the crust and get a pizza stone! lol. You can find the pizza dough recipe at 101 Cookbooks!

Friday, May 29, 2009

Ice Cream Sandwiches!

Mmm Nothing like ice cream (and ice cream on sale!) to kick off the summer! And yes, because the local grocery store was having an awesome sale on Dryer's (aka Edy's out here in the midwest O_O) I bought myself two tubs! And of course, what better way to eat ice cream than in an ice cream sandwich :) I had half a batch of the oatmeal cookie batter left over from when I made oatmeal raisin cookies last week sans raisins, so I baked those up and squished a blob of mint chocolate chip in the middle of two cookies, and voila! ice cream sandwiches! If you want to mimic the It's-It style sandwiches, dip them in chocolate and they should be good to go :) Also, of course, the ice cream flavor is completely up to you :) If you're freezer is strong, unlike mine, you might want to set the ice cream out for a few minutes to let it soften to a workable consistency before squishing it between cookies, or alternatively, let the ice cream soften in the refrigerator. Remember to stick them back in the freezer to let them firm up before sinking your teeth into them! lol.

Ice Cream Sandwich!

Oatmeal Cookies
from allrecipes

Ingredients

1 cup butter, softened
1 cup white sugar
1 cup packed brown sugar
2 eggs
1 teaspoon vanilla extract
2 cups all-purpose flour
1 teaspoon baking soda
1 teaspoon salt
1 1/2 teaspoons ground cinnamon
3 cups quick cooking oats

Directions

1. In a medium bowl, cream together butter, white sugar, and brown sugar. Beat in eggs one at a time, then stir in vanilla. Combine flour, baking soda, salt, and cinnamon; stir into the creamed mixture. Mix in oats. Cover, and chill dough for at least one hour.

2. Preheat the oven to 375 degrees F (190 degrees C). Grease cookie sheets. Roll the dough into 1-1.5 inch balls, and place 1 inches apart on cookie sheets.

3. Bake for 8 to 10 minutes in preheated oven. Allow cookies to cool on baking sheet for 5 minutes before transferring to a wire rack to cool completely.

Makes 50-60 2 inch cookies.

Raisin Scones

Raisin Scones

This is a recipe I stumbled upon last winter at Baking Bites, and it is absolutely wonderful! The recipe originally comes from the Cheeseboard in Berkeley which made me even more eager to test it out. These photos are from the first time I baked these (2/11/08 according to the date of the photo). And I just have to repeat..these scones are delicious, divine, heavenly...I could go on and on about these. But it's definitely not just me who loves these. Just about everyone who has tried these loved them! So far I've tried making raisin scones, cranberry orange scones, strawberry jam and walnut scones, raspberry scones, and mini chocolate chip scones. One of these days, I'll dedicate a post to the different variations of scones I've made...once I've tried out a few more flavor combinations! I digress. What I meant to say is you can test out any combination you want as it's pretty easy to adapt the basic recipe :) I also like to make miniature versions of these scones. It just makes me feel like I have more to eat from every batch ^_^;

Raisin Scones

Raisin Scones
adapted from Baking Bites

Ingredients

3-1/2 cups all-purpose flour
1/2 tsp baking soda
1 tbsp baking powder
1/2 tsp kosher salt
3/4 cup sugar
1 cup butter, chilled and cut into 1-inch cubes
1 cup raisins
3/4 cup heavy cream
3/4 cup buttermilk
sugar, for topping

Directions

1. Preheat oven to 375F and line a baking sheet with parchment paper.

2. Whisk together flour, baking soda, baking powder, salt and sugar together in a large bowl.

3. Add in butter, toss to coat, and rub in with your fingers (or a pastry cutter, if you prefer) until only pea-sized chunks remain.

4. Stir in currants, then add the cream and buttermilk, mixing only until the ingredients just come together into a ball. It is ok if there is a little flour left at the bottom of the bowl.

5. Divide dough into 12 balls (about 2-in in diameter, although the cheeseboard’s seem to be larger in the shop) and dip the top of each in sugar sugar before placing on the prepared baking sheet.

6. Bake for 25 to 30 minutes, until golden brown.

7. Cool on a wire rack.

Friday, May 22, 2009

Raspberry Buttermilk Cake

Raspberry Buttermilk Cake

Oh Memorial Day weekend. This is the one long weekend I used to look forward to every year when I was a student. There's always such a long break between spring break and the Memorial Day with no days off in between and that long stretch was just hard to get through sometimes. This year, luckily I only have classes Mondays and Wednesdays, so I'm having a nice and long 5-day weekend XD Of course, I have to bake something to celebrate and raspberries were on sale so the obvious choice was this cake I saw on smitten kitchen. I had all the ingredients and it is simple to make, plus there's nothing like berries to ring in the summer season!

I ended up pressing the raspberries too far into the batter so they all ended up on the bottom of my cake. But delicious nevertheless :)

Raspberry Buttermilk Cake
right out of the oven- you can see how many times i tested it for doneness lol

Raspberry Buttermilk Cake
yummy sugary top

Raspberry Buttermilk Cake
raspberries on the bottom

Raspberry Buttermilk Cake
adapted from smitten kitchen

1 cup (130 grams) all-purpose flour
1/2 teaspoon (2 grams) baking powder
1/2 teaspoon (2 grams) baking soda
1/4 teaspoon salt
1/2 stick (56 grams) unsalted butter, softened
2/3 cup (146 grams) plus 1 1/2 tablespoons (22 grams) sugar, divided
1/2 teaspoon pure vanilla extract
1/2 teaspoon finely grated lemon zest (optional)
1 large (57 grams) egg
1/2 cup well-shaken buttermilk
1 cup fresh raspberries (about 5 oz)

1. Preheat oven to 400°F with rack in middle. Butter and flour a 9x9 square cake pan.

2. Whisk together flour, baking powder, baking soda, and salt and set aside. In a larger bowl, beat butter and 2/3 cup sugar with an electric mixer at medium-high speed until pale and fluffy, about two minutes, then beat in vanilla and zest, if using. Add egg and beat well.

3. At low speed, mix in flour mixture in three batches, alternating with buttermilk, beginning and ending with flour, and mixing until just combined. Spoon batter into cake pan, smoothing top. Scatter raspberries evenly over top and sprinkle with remaining 1 1/2 tablespoons sugar. Be careful to not press raspberries too far into the batter otherwise they'll end up on the bottom.

4. Bake until cake is golden and a wooden pick inserted into center comes out clean, 20 to 25 minutes. Cool in pan 10 minutes, then turn out onto a rack and cool to warm, 10 to 15 minutes more. Invert onto a plate.
Oatmeal Raisin Cookies!

I love oatmeal raisin cookies! They're one of my comfort foods :) Interestingly enough, I never really had any until I started baking them on my own in college, and yet, I can manage to feel happy and nostalgic while I consume these.. It must be the combination of the chewy oatmeal cookie and the raisins. Oh. And the cinnamon. Let's not forget the cinnamon! Anyhow, I've made these from a couple of different recipes, and it looks like this was my recipe of choice, back on..2/11/08!

Oatmeal Raisin Cookies

Oatmeal Raisin Cookies
adapted from allrecipes

Ingredients

1 cup butter, softened
1 cup white sugar
1 cup packed brown sugar
2 eggs
1 teaspoon vanilla extract
2 cups all-purpose flour
1 teaspoon baking soda
1 teaspoon salt
1 1/2 teaspoons ground cinnamon
3 cups quick cooking oats
1/3 cup raisins

Directions

1. In a medium bowl, cream together butter, white sugar, and brown sugar. Beat in eggs one at a time, then stir in vanilla. Combine flour, baking soda, salt, and cinnamon; stir into the creamed mixture. Mix in oats and then mix in raisins. Cover, and chill dough for at least one hour.

2. Preheat the oven to 375 degrees F (190 degrees C). Grease cookie sheets. Roll the dough into walnut sized balls, and place 2 inches apart on cookie sheets.

3. Bake for 8 to 10 minutes in preheated oven. Allow cookies to cool on baking sheet for 5 minutes before transferring to a wire rack to cool completely.

Friday, May 15, 2009

Candied Orange Peels

Mmmm I love candied orange peels! They're chewy and sweet with a slight tart note to them. These are so easy to make and so easy to distribute and share too! I've made these a couple of times, and in this instance, I covered them before they dried, so the sugar dissolved quite a bit..so please don't do imitate that ^_^;; I also made some and dipped them in melted mint chocolate, which I wasn't too fond of..the mint flavor was overpowering and the lovely orange flavor was lost -__-; Perhaps a regular dark chocolate would have been better! All in all, I love these as they are, and I can assure you most of my friends who've tried these enjoy them as well :)

Candied Orange Peels

Candied Orange Peel
from Baking Bites

Ingredients

6 medium oranges
1 tablespoon salt
2 cups sugar
a lot of water

Directions

1. Cut peel of each orange in sixths; loosen from pulp with spoon and remove most pith (white membrane) from peel. Add salt and peel to 4 cups of water and let stand overnight.

2. Drain and rinse thoroughly.

3. In a pot, cover peels with cold water. Heat to boiling and then drain. Repeat 3 times (this is to remove any bitter taste).

4. Cut peel into strips. In sauce pan, combine peel, sugar and 1/2 cup water. Heat and stir until sugar dissolves. Continue to cook until peel is translucent. Drain any liquid and roll peel in granulated sugar. Allow to dry.

5. If desired (and we did), melt dark or bittersweet chocolate over double boiler and dip each dried strip in. Refrigerate until chocolate is firm.

Saturday, May 9, 2009

I fail at reading

Butterscotch Thins

I saw this recipe and thought it'd be the perfect one to do. I have tons of dark brown sugar that's been waiting to be used (and getting clumpier by the day..I'll have to remember to store dk brown sugar better from now on o_o) and lots of butter of course! This looked quite simple and easy to throw together so I thought it'd be no biggie to do this on a laid back Friday.

Of course things don't always turn out as planned...The dough was incredibly sticky, as warned in the recipe, but probably due to my incredibly lame log-making skills, I couldn't get the dough to form a nice log. I ended up chilling the dough in the fridge for half an hour before turning it out onto parchment paper to shape, but that half hour didn't really help with making the dough more workable. I wound up first chilling one large log in the freezer for a couple of hours and then cut that log in half and made two smaller logs and chilled those overnight. I can tell you this dough does not get hard. Even after an overnight rest in the freezer, it was still rather soft to the touch and warmed up really quickly once taken out. I also found that 10 minutes at 350 was much to long for my poor cookies...and then subsequent testings at different temps and times somehow did not produce the pretty golden cookies that were pictured on the baking bites site ;__; So then, I finally went back to check the recipe, and lo and behold I mixed up baking powder with baking soda -_-;; One thing to say though is that even though they all turned out really brown and did not look too appetizing...they were still delicious. That's a testament to the flavor of these cookies!

Butterscotch Thins

Look out for a subsequent test with baking powder rather than baking soda...it'll be coming in a couple of weeks!

and here's the recipe if anyone wants to um..replicate my failure..

Butterscotch Thins
adapted from Baking Bites

1 cup all purpose flour
2 tsp baking soda
3/4 tsp salt*
1/2 cup salted butter
1 1/2 cups dark brown sugar
2 large eggs
2 tsp vanilla extract

1. Whisk together flour, baking powder and salt in a small bowl and set aside.

2. In a medium bowl, cream together butter and sugar until mixture resembles wet sand. Beat in eggs, one at a time, followed by vanilla extract. With the mixer on low speed, or working by hand, blend in flour mixture until no streaks of flour remain.

3. Chill dough in the refrigerator for at least half an hour.

4. Transfer dough, which will be very sticky, to a large piece of wax paper and roll it up into a log.

5. Freeze for at least 1-2 hours.

6. Cut log in half to form two smaller logs. Freeze logs for at least 1-2 hours or overnight.

7. Preheat oven to 350F and line a baking sheet with parchment paper.

8. Cut dough into slices no more than 1/4-inch thick and place on prepared baking sheet, leaving plenty of room for the cookies to spread. These cookies spread to about 2x their original size.

9. Bake for about 7 minutes, until cookies are a nice dark caramel color. For crispy cookies, increase the baking time by a minute or two.

10. Cool for a minute or two on the baking sheet, then transfer to a wire rack to cool completely.

11. Cookies should be cooled completely before eating (otherwise they might stick to your teeth) and can be stored in an airtight container.

*use less if you prefer weaker salty taste or go with the original recipe's 1/2 C unsalted butter and 1tsp salt. I had lots of salted butter I needed to use so I chose to use salted butter instead

Friday, May 8, 2009

Carrot Cupcakes!

I've always loved carrot cake..since when I was growing up, my mom only made carrot cake or cheesecake. That was the extent of my mom's baking repertoire lol. I don't make carrot cake often and I think I was really craving some when I baked these. They turned out quite well, the only fumble I had was with the white chocolate in the frosting..I didn't work fast enough and there were some tiny white chocolate bits in there..oops :X I also found the frosting rather sweet, but that might just be because my mom never frosted her cake, so I'm used to eating carrot cake unfrosted lol. Mmm but looking at these photos makes me want to make carrot cake all over again :)

Carrot (Cup)Cake - prior to frosting
before frosting

cupcakes frosted
after frosting

inside the cupcake =O
...and inside!

Carrot Cupcakes
from allrecipes

Ingredients

Frosting

2 ounces white chocolate
1 (8 ounce) package cream cheese, softened
1/2 cup unsalted butter, softened
1 teaspoon vanilla extract
1/2 teaspoon orange extract
4 cups confectioners' sugar
2 tablespoons heavy cream

Cake

2 eggs, lightly beaten
1 1/8 cups white sugar
1/3 cup brown sugar
1/2 cup vegetable oil
1 teaspoon vanilla extract
2 cups shredded carrots
1/2 cup crushed pineapple
1 1/2 cups all-purpose flour
1 1/4 teaspoons baking soda
1/2 teaspoon salt
1 1/2 teaspoons ground cinnamon
1/2 teaspoon ground nutmeg
1/4 teaspoon ground ginger
1 cup chopped walnuts

Directions

1. Preheat oven to 350 degrees F (175 degrees C). Lightly grease 12 muffin cups.

2. In small saucepan, melt white chocolate over low heat. Stir until smooth, and allow to cool to room temperature.

3. In a bowl, beat together the cream cheese and butter until smooth. Mix in white chocolate, 1 teaspoon vanilla, and orange extract. Gradually beat in the confectioners' sugar until the mixture is fluffy. Mix in heavy cream.

4. Beat together the eggs, white sugar, and brown sugar in a bowl, and mix in the oil and vanilla. Fold in carrots and pineapple. In a separate bowl, mix the flour, baking soda, salt, cinnamon, nutmeg, and ginger. Mix flour mixture into the carrot mixture until evenly moist. Fold in 1/2 cup walnuts. Transfer to the prepared muffin cups.

5. Bake 25 minutes in the preheated oven, or until a toothpick inserted in the center of a muffin comes out clean. Cool completely on wire racks before topping with the icing and sprinkling with remaining walnuts.

Tuesday, May 5, 2009

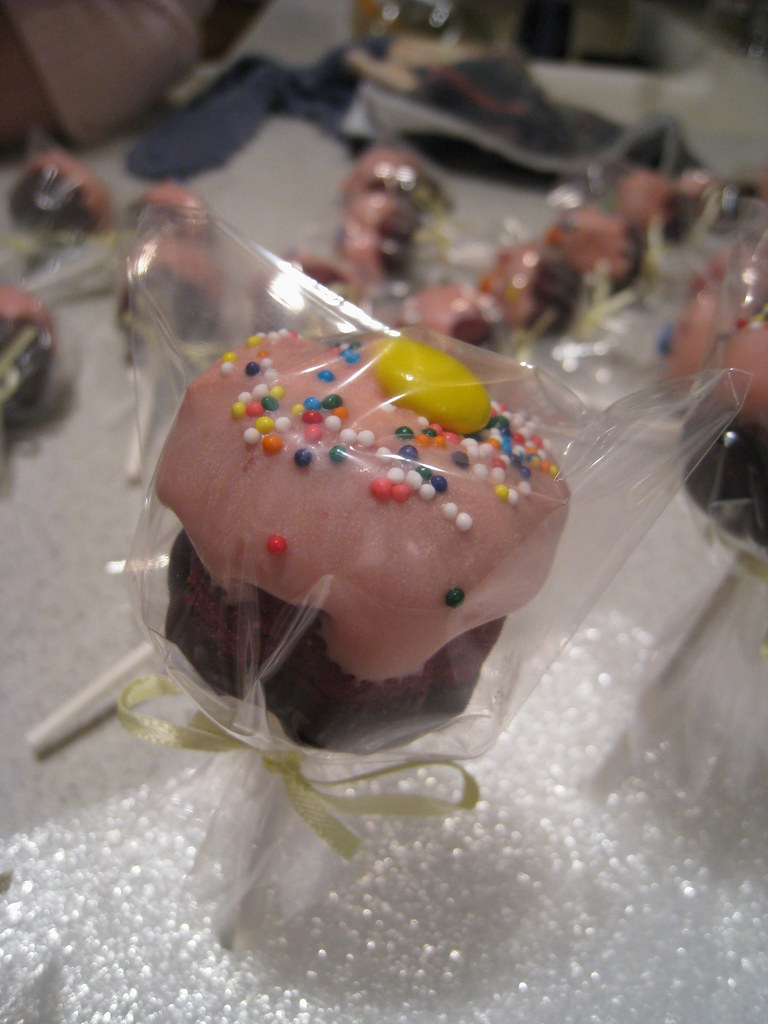
Cupcake pops!

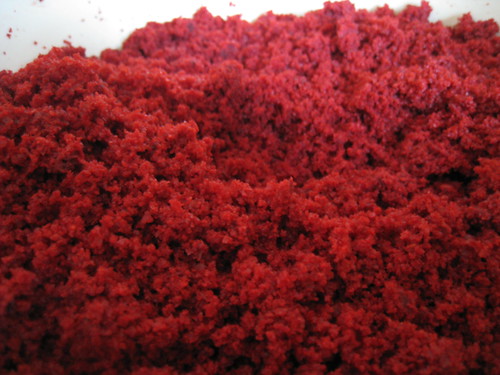
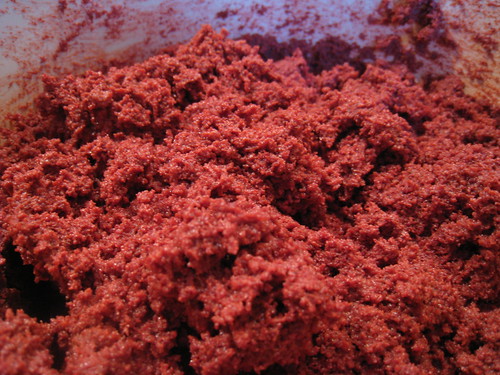
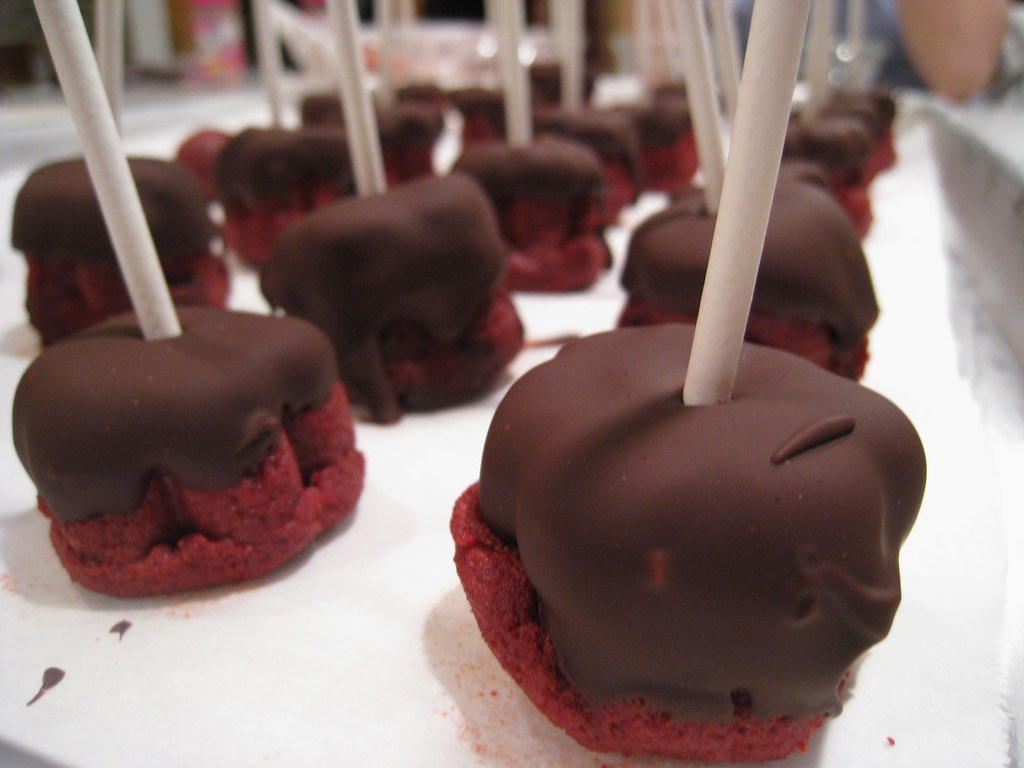
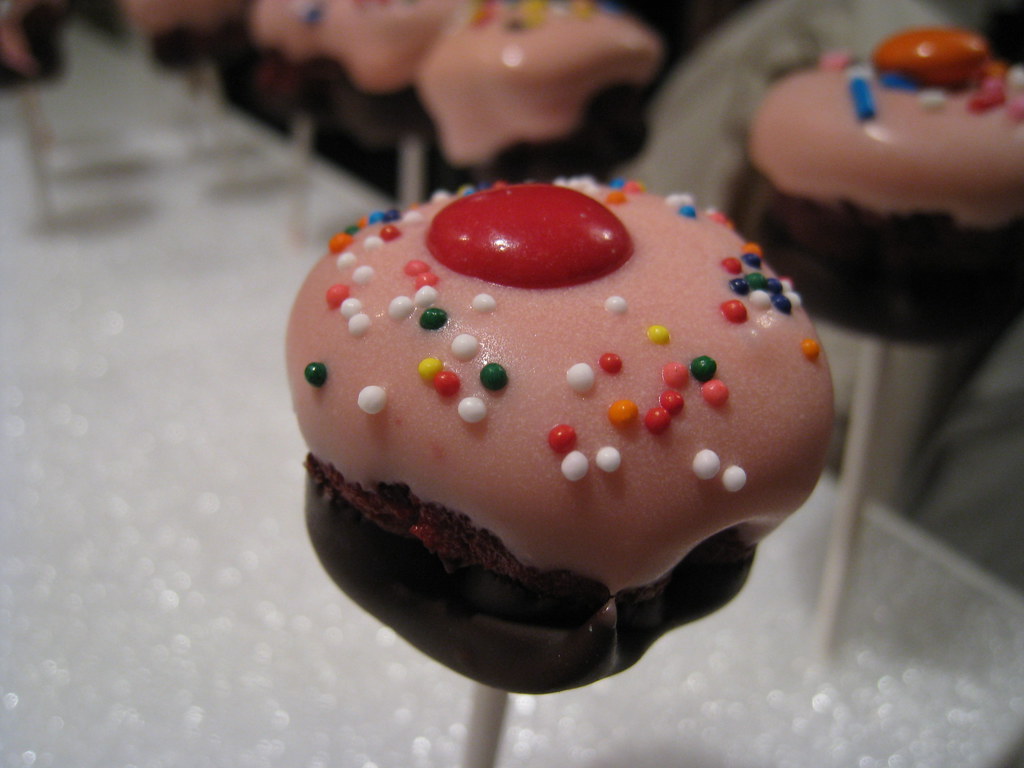
Inspired by Bakerella a couple of friends and I decided to try and make our own cupcake pops too! The process took longer than we expected and our end products don't quite look the same as Bakerella's but they're still quite cute :) It took us about 4 hours from crumbling the cake to individually wrapping them. I would say this would not be something I would do often unless I had premade cake and a lot of time on my hands.. or maybe work over the span of 2 days...or many helping hands! Nonetheless it was all good fun and there's nothing like ending the semester on a sweet note :)

for detailed directions check out Bakerella's tutorial!

crumbled cake
crumbled cake! i used a box mix this time

cake and frosting mix
crumbled cake + cream cheese frosting

half dipped pops
dipped bottoms! i forgot to take photos of the rounded balls and of the shaped cake balls :X oh well..

cupcake pop
finished pop!

finished product
our finished product :)

Monday, May 4, 2009

Za's

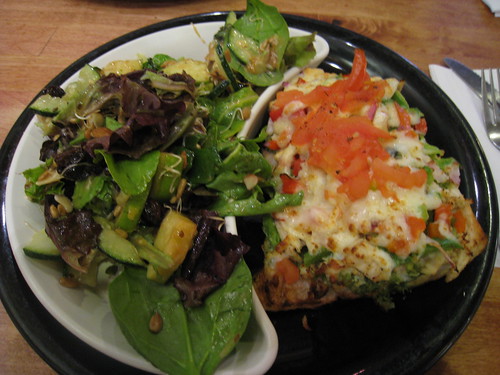
Mia Za's Cafe seems to be one of those places you have to try on campus at the U of M. Of course it doesn't hurt that it's right across the street from the School of Education, so it's very convenient (for us anyway!) as well. Mia Za's provides what seems like a million options for dining, from their set menus to creating your own combinations. They have 4 different menus, salads, pastas, pizzas, and paninis, to choose and customize from. I've had their pastas, salads, and paninis and I have to say it's pretty good for campus food. I don't think I'd ever wake up in the middle of the night with sudden hunger pangs for Za's but it's definitely one of the better alternatives to bringing a packed lunch to campus.

half salad and panini
Half salad, half panini, both customized to my liking :)

Friday, May 1, 2009

Quest for the Perfect Chocolate Chip Cookie

Another old recipe update! I'm always up for trying a new chocolate chip cookie recipe as I haven't really found me go to recipe yet. Although I do use one particular recipe from my college days quite often because it's tasty and nostalgic! That any my old housemates gobbled them up..just like cookie monster would (I'm looking at you S!)

Anyhow, this recipe comes from Baking Bites and the fresh baked cookies were the best. Crisp on the outside and soft and chewy on the inside..mmm delicious!

Chewy Chocolate Chip Cookies

Chewy Chocolate Chip Cookies
from Baking Bites

Ingredients

2 cups plus 2 tbsp all purpose flour
1/2 tsp baking soda
1 tsp salt
3/4 cup butter (12 tbsp), melted and cooled until just warm
1 cup brown sugar
1/2 cup white sugar
1 egg
1 egg yolk
2 tsp vanilla extract
1 1/4 cups chocolate chips

Directions

1. Preheat oven to 325F. Line a baking sheet with parchment paper.

2. In a medium bowl, whisk together flour, baking soda and salt.

3. In a large bowl, whisk together butter and sugars. Beat in the egg, egg yolk and vanilla. Stir in flour mixture, followed by chocolate chips.

4. Drop by (scant) 1/4 cups onto the baking sheet and pat lightly so the cookie is an even thickness, not a ball shape. Cookies will spread as they bake and this ensures a more even spread.

5. Bake at 325F for 15-17 minutes, until just turning light brown all over. The edges should only be very slightly more brown, if at all, from the rest of the cookie. Allow cookies to cool before removing them from the baking sheet.

Makes 18-24 large cookies